This week we started our pinhole trailer project. A pinhole trailer is a trailer that can be used as a pinhole camera and as a mobile development lab. Once the trailer is completed, we hope to take the trailer to elementary schools to have our high school students teach the younger students about photography. The younger students will get to sit inside the trailer and see the image from the pinhole form on the wall opposite of them. Our students will explain how this works, the younger students will build pinhole cameras of their own, take pictures with them, and develop them in the trailer.
The students came up with a design for the trailer.

Next, they researched commercial options, and we purchased a trailer this week.
In addition, our students learned about pinhole cameras. A pinhole camera, or any camera, has four parts: a light tight body, an aperture (opening), a shutter, and a film plane.
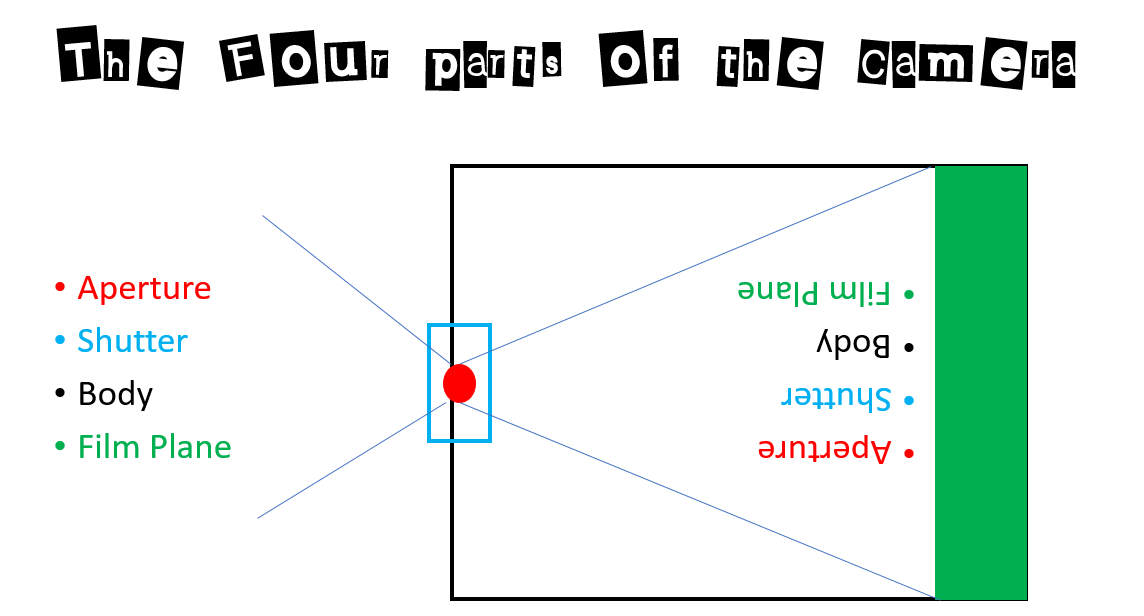
When the shutter is lifted, allowing light to enter the body through the aperture, an inverse image of the scene is formed on the film plane. To help students visualize how this works, we had the students convert the classroom into a very large pinhole camera.
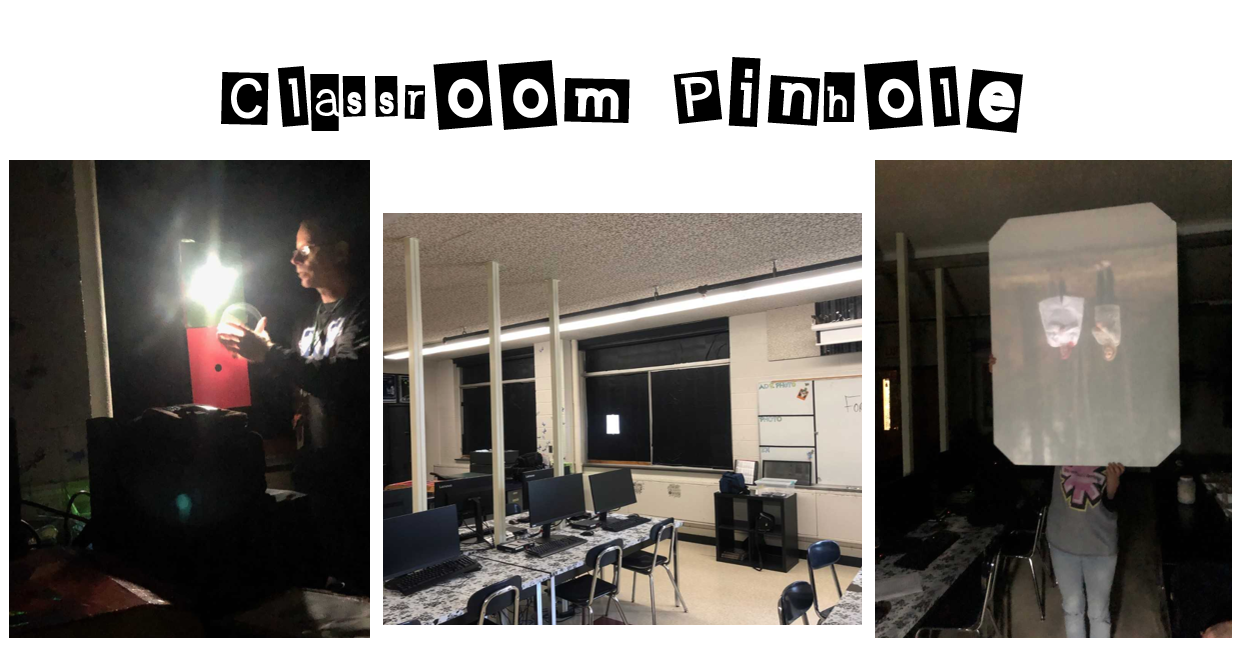
All of the windows were blacked out, except for one small paper sized square (middle image above). Different sized paper apertures were placed over the square (above left), which turned the room into a large pinhole camera. A piece of foam board was used as the film plane (above right), and the film plane was moved back and forth until the image was in focus. Students repeated this process with various aperture sizes to explore the relationships between aperture size, depth of field, image sharpness, and image brightness (which relates to exposure time.) They also used lens with the different apertures to see how the image quality was affected. Next week, students will be building their own pinhole camera.

Leave a comment